Python Development Bootstrap on Managing Environment and Packages
If you have basic python experience and knowledge and willing to develop a real python application or product, I think that post is right for you. Let’s recap how do we start to use Python, we either go to official site to download python, install it on system wise then jump start to write “Hello, world!” or install Anaconda to get a long list of pre-installed libraries and then do the same thing. I would say that is totally ok by using python globally or system wise at the beginning stage, but as we accumulate enough python scripts and do the real python project, we may found something really painful during our development
- Version confusion: different python versions reside together as well as pip versions
- Package redundancy: too many libraries in one place, some of them you use only for some practice and never use them again
- Package version conflict: that is the most severe one and headache, imagine
- your early development based on python2, you move to python3 afterwards, but you found your early applications break after you upgrade package version on which your python2 applications dependent, because those libraries are not backwards compatible
- even all your development based on python3, you still stuck on the situation that one library of your new development needs high version sub-dependency package but your early development rely on the same sub-dependency package but with lower version
- when you work with team, you need to pass your work to other teammate to test, your application breaks due to there no unique environment and packages between your machines
Therefore, for real python production development, the first step should set up a proper virtual environment to be able to compatibility and collaboration before jump to coding. Thanks to community contributors, we have multiple choices to meet our different requirements and needs, there are 3 ways to do that, they are
- Python early official solution: venv (virtualenv) and pip
- Python latest official solution: pipenv
- Conda environment and package management tool
now let’s see how do we do the configuration.
Python early official solution: venv (virtualenv) and pip
venv formerly known as virtualenv is official build-in packages for managing virtual environment. It separates a special python environment with user defined python interpreter and packages in a separated folder where user project is located. When virtual environment is started, it will temporarily modify system environment variables, in this way, no matter what modules or libraries you install, they are all in project folder, after existing virtual environment, the system environment variables restored, and the operations you do in project folder won’t affect any python system wise setting and working environment.
Install even
You can use pip command to install venv if you don’t find it in your system. We can use pip list | grep pip command to check availability
1 | pip install venv |
Create venv virtual environment for project
Firstly, make a new project folder and enter new folder:
1 | mkdir /home/user1/tmp/ |
Secondly, execute venv vetest1 to create virtual environment in current folder
1 | python3 -m venv vetest1 |
*if you want to create python2 environment, the command line should be python2 -m venv vetest1
Launch and exist virtual environment
For launch virtual environment, use source <directory>/activate command to start:
1 | source /home/user1/tmp/vetest1/bin/activate |

you can see your prompt head title start with (vestest1) which means your virtual environment is now started. Now let’s check the python version in this environment by issue command python --version

alternatively, enter the directory and check python binary file
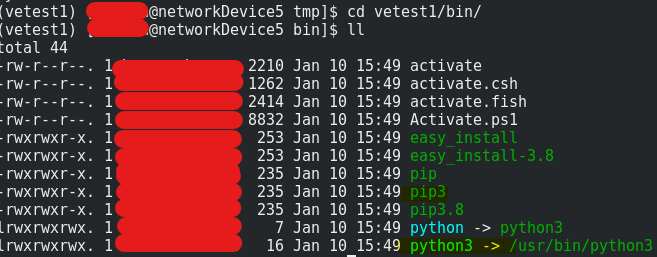
next, let’s pip download some package e.g. matplotlib to check if would be resided in virtual environment folder
1 | python -m pip install matplotlib |
*you can directly use python or pip after you are in virtual environment
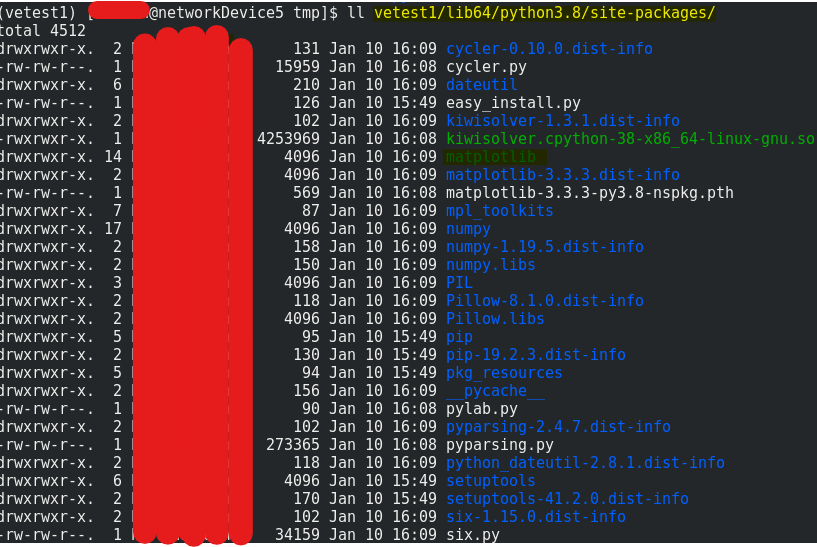
you can see the visualization library matplotlib is installed in virtual environment directory other than python system package folder.
Exist virtual environment by issue command deactivate, you will see the command line title never start with virtual environment name but restore normal display.

Let your IDE recognizes your new virtual environment – PyCharm and VS Code
We can’t only rely on interactive console to do development so that let our favorite IDE recognize virtual environment is quite important. Undoubtedly, PyCharm is the best python IDE, VS Code is becoming a popular IDE for all language by ton of plugins. Now let’s see how do we configure PyCharm and VS Code.
For PyCharm, launch it by creating new project, on prompt window assign a project directory such as /home/user1/pydev1, then choose Previously configured interpreter radio button, then choose our new created virtual environment bin folder python file as interpreter.
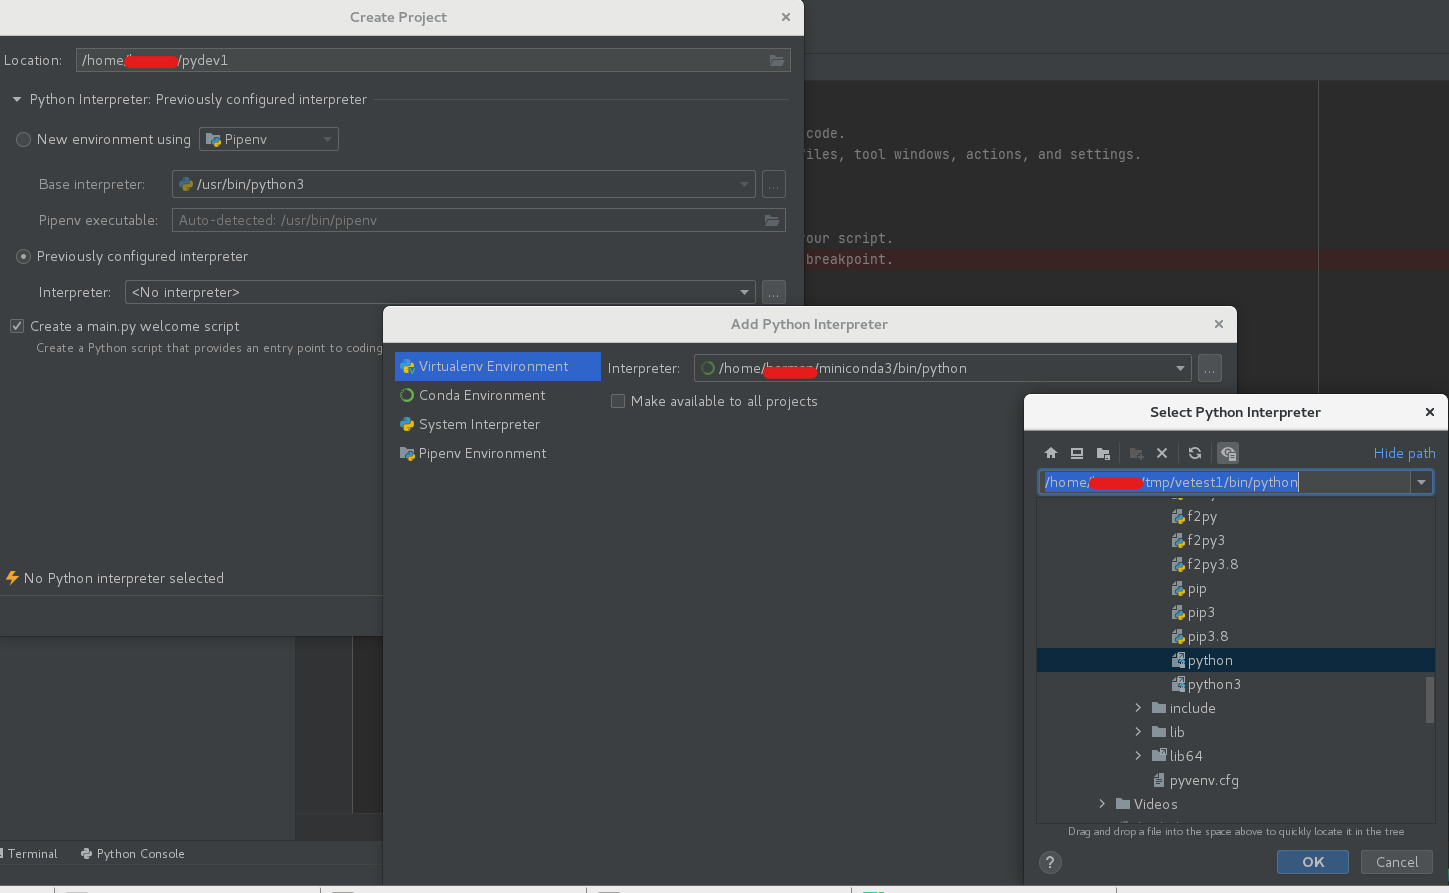
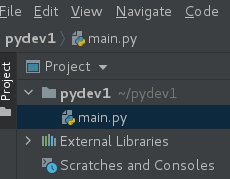

now you can see the python interpreter is pointing to our virtual environment with python 3.8.
For VS Code, launch it then click left part of status bar, from prompt window to find our new created virtual environment bin folder python file as interpreter
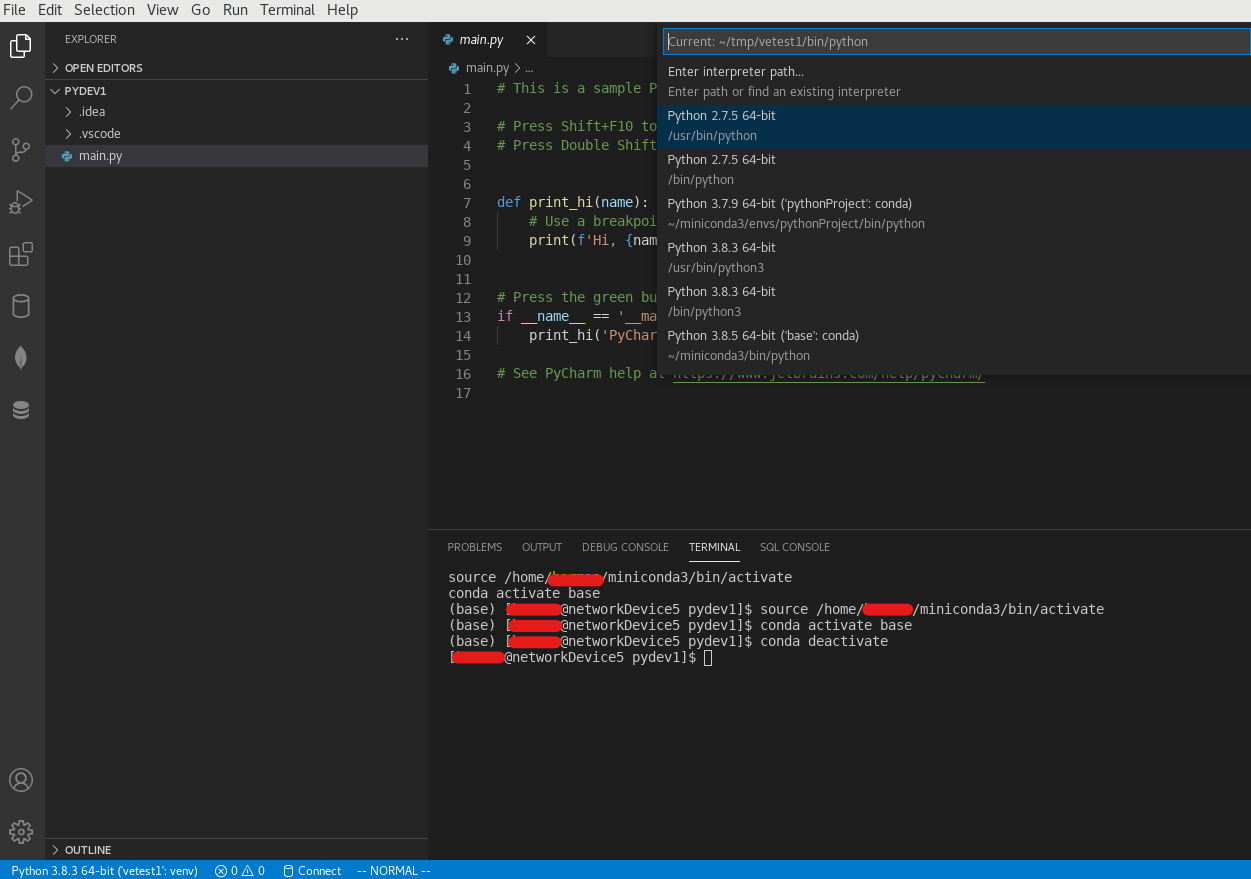

you can see now python interpreter is our virtual environment vetest1.
Create python2 virtual environment
For senior python user, you might still need python2 environment, very similar with python3 but change command from python3 venv -m vetest2 to python -m even vetest2
1 | python -m virtualenv vetest2 |
Python latest official solution: pipenv
Every new technology emerging and booming are driven by reality demand, that still applies to python, such as why pipenv comes up with new features after pip and virtualenv.
“What is rational is actual and what is actual is rational” —- Hegel,Georg Wilhelm Friedrich
pipenv has a lot of advantages versus its parent generation product virtualenv or venv, simply say, it combine environment and package management together, but actually much more than that, for that part, I will reference Alexander VanTol post in Real Python.
Alexander is an avid Pythonista who spends his time on various creative projects involving programming, music, and creative writing.
Problems that Pipenv solves
o understand the benefits of Pipenv, it’s important to walk through the current methods for packaging and dependency management in Python.
Let’s start with a typical situation of handling third-party packages. We’ll then build our way towards deploying a complete Python application.
Dependency Management with requirements.txt
Imagine you’re working on a Python project that uses a third-party package like flask. You’ll need to specify that requirement so that other developers and automated systems can run your application.
So you decide to include the flask dependency in a requirements.txt file:
1 | flask |
Great, everything works fine locally, and after hacking away on your app for a while, you decide to move it to production. Here’s where things get a little scary…
The above requirements.txt file doesn’t specify which version of flask to use. In this case, pip install -r requirements.txt will install the latest version by default. This is okay unless there are interface or behavior changes in the newest version that break our application.
For the sake of this example, let’s say that a new version of flask got released. However, it isn’t backward compatible with the version you used during development.
Now, let’s say you deploy your application to production and do a pip install -r requirements.txt. Pip gets the latest, not-backward-compatible version of flask, and just like that, your application breaks… in production.
“But hey, it worked on my machine!”—I’ve been there myself, and it’s not a great feeling.
At this point, you know that the version of flask you used during development worked fine. So, to fix things, you try to be a little more specific in your requirements.txt. You add a version specifier to the flask dependency. This is also called pinning a dependency:
1 | flask==0.12.1 |
Pinning the flask dependency to a specific version ensures that a pip install -r requirements.txt sets up the exact version of flask you used during development. But does it really?
Keep in mind that flask itself has dependencies as well (which pip installs automatically). However, flask itself doesn’t specify exact versions for its dependencies. For example, it allows any version of Werkzeug>=0.14.
Again, for the sake of this example, let’s say a new version of Werkzeug got released, but it introduces a show-stopper bug to your application.
When you do pip install -r requirements.txt in production this time, you will get flask==0.12.1 since you’ve pinned that requirement. However, unfortunately, you’ll get the latest, buggy version of Werkzeug. Again, the product breaks in production.
The real issue here is that the build isn’t deterministic. What I mean by that is that, given the same input (the requirements.txt file), pip doesn’t always produce the same environment. At the moment, you can’t easily replicate the exact environment you have on your development machine in production.
The typical solution to this problem is to use pip freeze. This command allows you to get exact versions for all 3rd party libraries currently installed, including the sub-dependencies pip installed automatically. So you can freeze everything in development to ensure that you have the same environment in production.
Executing pip freeze results in pinned dependencies you can add to a requirements.txt:
1 | click==6.7 |
With these pinned dependencies, you can ensure that the packages installed in your production environment match those in your development environment exactly, so your product doesn’t unexpectedly break. This “solution,” unfortunately, leads to a whole new set of problems.
Now that you’ve specified the exact versions of every third-party package, you are responsible for keeping these versions up to date, even though they’re sub-dependencies of flask. What if there’s a security hole discovered in Werkzeug==0.14.1 that the package maintainers immediately patched in Werkzeug==0.14.2? You really need to update to Werkzeug==0.14.2 to avoid any security issues arising from the earlier, unpatched version of Werkzeug.
First, you need to be aware that there’s an issue with the version you have. Then, you need to get the new version in your production environment before someone exploits the security hole. So, you have to change your requirements.txt manually to specify the new version Werkzeug==0.14.2. As you can see in this situation, the responsibility of staying up to date with necessary updates falls on you.
The truth is that you really don’t care what version of Werkzeug gets installed as long as it doesn’t break your code. In fact, you probably want the latest version to ensure that you’re getting bug fixes, security patches, new features, more optimization, and so on.
The real question is: “How do you allow for deterministic builds for your Python project without gaining the responsibility of updating versions of sub-dependencies?”
Development of Projects with Different Dependencies
Let’s switch gears a bit to talk about another common issue that arises when you’re working on multiple projects. Imagine that ProjectA needs django==1.9, but ProjectB needs django==1.10.
By default, Python tries to store all your third-party packages in a system-wide location. This means that every time you want to switch between ProjectA and ProjectB, you have to make sure the right version of django is installed. This makes switching between projects painful because you have to uninstall and reinstall packages to meet the requirements for each project.
The standard solution is to use a virtual environment that has its own Python executable and third-party package storage. That way, ProjectA and ProjectB are adequately separated. Now you can easily switch between projects since they’re not sharing the same package storage location. PackageA can have whatever version of django it needs in its own environment, and PackageB can have what it needs totally separate. A very common tool for this is virtualenv (or venv in Python 3).
Pipenv has virtual environment management built in so that you have a single tool for your package management.
Dependency Resolution
What do I mean by dependency resolution? Let’s say you’ve got a requirements.txt file that looks something like this:
1 | package_a |
Let’s say package_a has a sub-dependency package_c, and package_a requires a specific version of this package: package_c>=1.0. In turn, package_b has the same sub-dependency but needs package_c<=2.0.
Ideally, when you try to install package_a and package_b, the installation tool would look at the requirements for package_c (being >=1.0 and <=2.0) and select a version that fulfills those requirements. You’d hope that the tool resolves the dependencies so that your program works in the end. This is what I mean by “dependency resolution.”
Unfortunately, pip itself doesn’t have real dependency resolution at the moment, but there’s an open issue to support it.
The way pip would handle the above scenario is as follows:
- It installs
package_aand looks for a version ofpackage_cthat fulfills the first requirement (package_c>=1.0). - Pip then installs the latest version of
package_cto fulfill that requirement. Let’s say the latest version ofpackage_cis 3.1.
This is where the trouble (potentially) starts.
If the version of package_c selected by pip doesn’t fit future requirements (such as package_b needing package_c<=2.0), the installation will fail.
The “solution” to this problem is to specify the range required for the sub-dependency (package_c) in the requirements.txt file. That way, pip can resolve this conflict and install a package that meets those requirements:
1 | package_c>=1.0,<=2.0 |
Just like before though, you’re now concerning yourself directly with sub-dependencies (package_c). The issue with this is that if package_a changes their requirement without you knowing, the requirements you specified (package_c>=1.0,<=2.0) may no longer be acceptable, and installation may fail… again. The real problem is that once again, you’re responsible for staying up to date with requirements of sub-dependencies.
Ideally, your installation tool would be smart enough to install packages that meet all the requirements without you explicitly specifying sub-dependency versions.
Install Pipenv
Because pipenv is official replacement of pip and venv, so we use pip installs pipenv after that we can forget its precedence.
1 | python3 -m pip install pipenv |
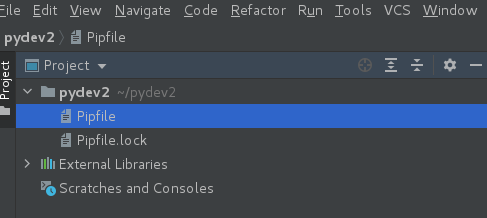
unlike venv, it will create project folder for us in we assigned folder, for pipenv, we need to create project folder by ourselves then enter it, in this case, our project folder is pydev2, after we create a virtual environment, pipenv created a environment folder for us in /home/user/.local/share/virtualenvs, sounds like wired, but it’s good setting, let’s see later on.
1 | cd ~ |
we’d better create a soft link for pipenv in /user/bin/ so that we don’t need to type python3 -m every time.
1 | ln -s /usr/local/python3/bin/pipenv /usr/bin/pipenv |
Create pipenv virtual environment for project
There are 2 ways to do that, first one is use pipenv shell command to launch environment shell; the other way is install a package by use pipenv
1 | pipenv --python 3.8 || pipenv shell |

From above return message, we know our virtual environment has been created with location: /home/user/.local/share/virtualenvs/pydev2-ro0T2QJC(suffix is system generated randomly), you might be confused there why pipenv create a separated folder rather than using user created project folder? I would say that a good feature of pipenv over venv, Pipenv separates your development environment and python environment, which makes you more focus on your project stuff other than those python supporting files, actually these two folders are associated with each other, every time you install a new package, package file will be on virtual environment folder but the relevant configuration value will be written into Pipfile which is a replacement for requirement.txt file in old age.
Launch pipenv virtual environment and install a new package
We use pipenv shell command to start to use new virtual environment:
1 | cd /home/user/pydev2 |

our new virtual environment is launched successfully! We can now check our project and environment information
1 | pipenv --where |

Now, let’s install another data visualization package seaborn in pydev2.
1 | pipenv install seaborn |
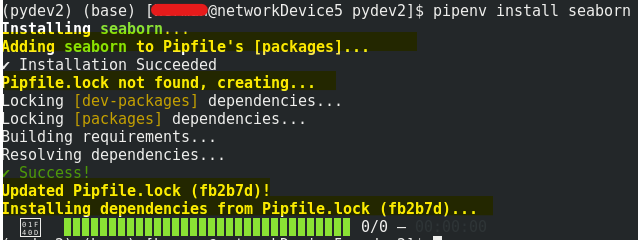
like previous chapter mentioned, when package has multiple dependencies and sub-dependencies, Pipenv will generate Pipfile.lock automatically which is a JSON file, if you familiar with JavaScript or NodeJS, you might find it is very similar with packages.json file after you install a module by using npm install express --save
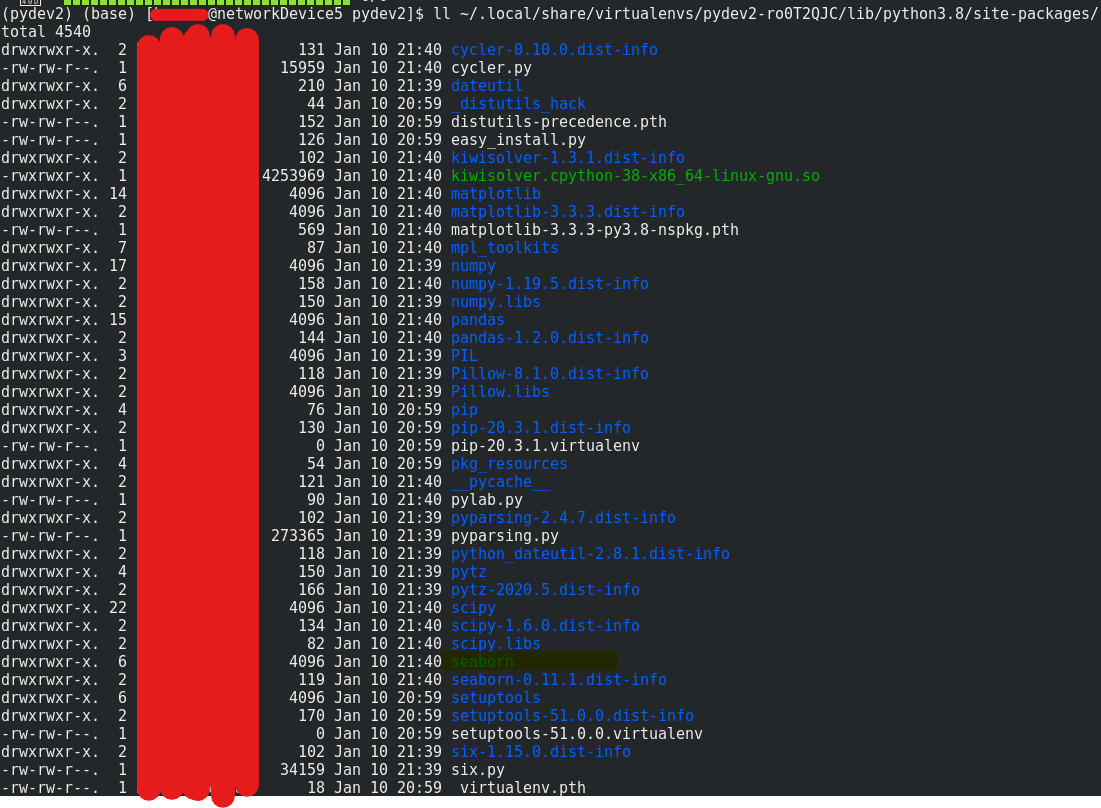
you can see seaborn and its dependent packages are all installed into virtual environment folder.
To exist Pipenv, use deactivate command in shell.
IDE preparation for virtual environment – PyCharm and VS Code
PyCharm provides three virtual environment options
- virtualenv or venv
- pipenv
- conda
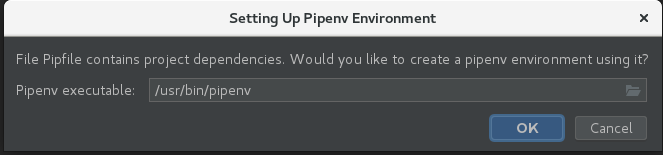
similar with previous chapter mentioned on venv, launch PyCharm, open our project folder pydev2, PyCharm is smart enough to be able to recognize pipenv environment project, all we need to do is just click ok on prompt window, then every thing done.

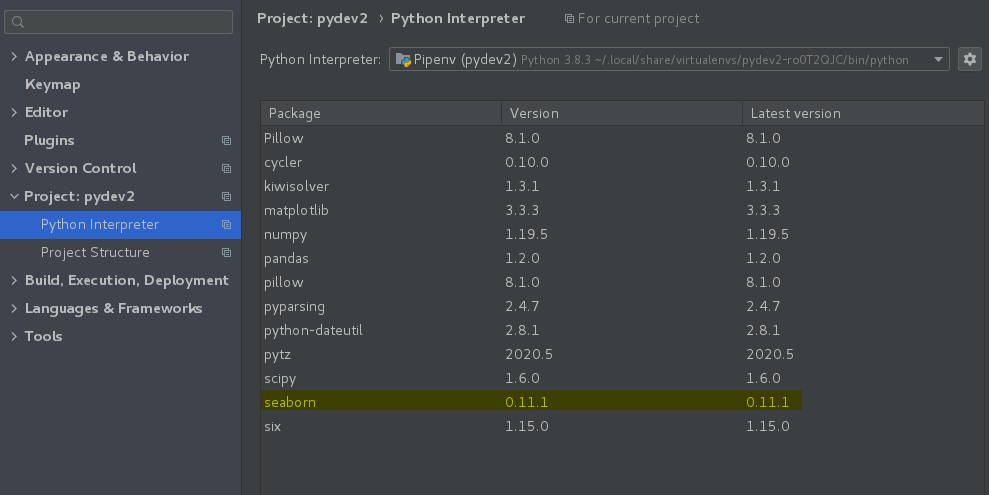
go to PyCharm interpreter setting page, you can see all libraries reside under the virtual environment
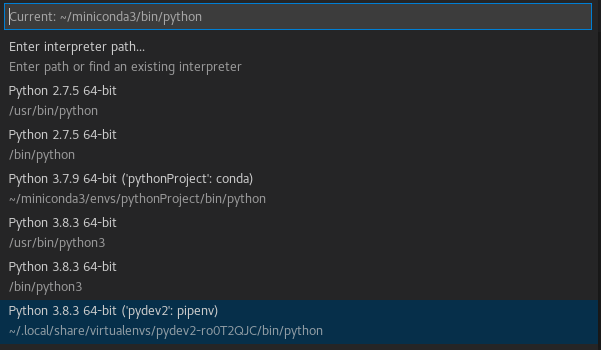
VS Code is also very similar with venv setting, open project folder /home/user/pydev2 then click left part of status bar (at bottom), choose “Python 3.8.3 64-bit (‘pydev2’: pipenv)” from prompt window

Conda environment and package management tool
From personal perspective, my favorite environment and package management tool is conda, by leveraging powerful CLI tool and makes your work never become such easy and clear. With conda, you can create, export, list, remover, and update environments that have different versions of Python and/or packages installed in them. Switching or moving between environments is called activating the environment. You can also share an environment file.
Create a conda virtual environment with CLI
In Linux like centos or ubuntu, decompress miniconda package to our home directory, now we are good to go to create conda environment
1 | conda create --name pydev |
replace ‘pydev’ with any name you like, this command will create an empty environment without Python interpreter and is in /home/user/minicoda/env path.
By default, environments are installed into the
envsdirectory in your conda directory. See Specifying a location for an environment or runconda create --helpfor information on specifying a different path.
To create an environment with a specific version of Python:
1
conda create -n pydev python=3.6
To create an environment with a specific package:
1
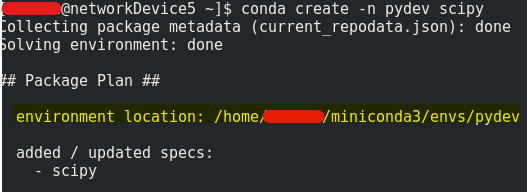
conda create -n pydev scipy
OR
1
2conda create -n pydev python
conda install -n pydev scipy
conda will install the latest scipy version, for Python interpreter version will be align with system
To create an environment with a specific version of a package:
1
conda create -n myenv scipy=0.15.0
OR:
1
2conda create -n myenv python
conda install -n myenv scipy=0.15.0To create an environment with a specific version of Python and multiple packages:
1
conda create -n pydev python=3.6 scipy=0.15.0 seaborn babel matplotlib
Tip: Install all the programs that you want in this environment at the same time. Installing 1 program at a time can lead to dependency conflicts.
Launch and exit conda environment
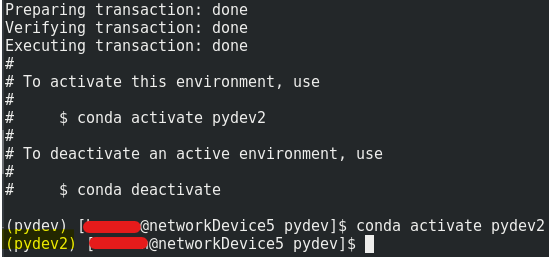
To activate conda environment:
1 | conda activate pydev |

To exit conda environment:
1 | conda deactivate |

conda activateandconda deactivateonly work on conda 4.6 and later versions. For conda versions prior to 4.6, run:
- Windows:
activateordeactivate- Linux and macOS:
source activateorsource deactivate
View a list of your environments
To see a list of all of your environments, in your terminal window or an Anaconda Prompt, run:
1 | conda info --envs |
OR
1 | conda env list |
A list similar to the following is displayed:
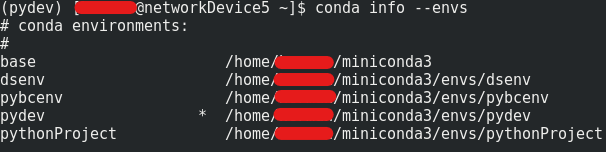
asterisk tells current activate environment
View a list of the packages in an environment
To see a list of all packages installed in a specific environment:
If the environment is not activated, in your terminal window or an Anaconda Prompt, run:
1
conda list -n myenv
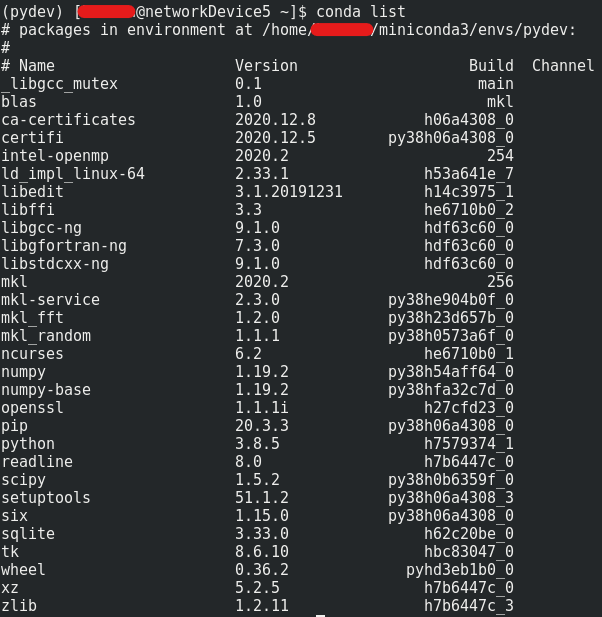
If the environment is activated, in your terminal window or an Anaconda Prompt, run:
1
conda list
To see if a specific package is installed in an environment, in your terminal window or an Anaconda Prompt, run:
1
conda list -n myenv scipy
Build identical conda environments
You can use explicit specification files to build an identical conda environment on the same operating system platform, either on the same machine or on a different machine.
Use the terminal or an Anaconda Prompt for the following steps:
Run
conda list --explicitto produce a spec list such as: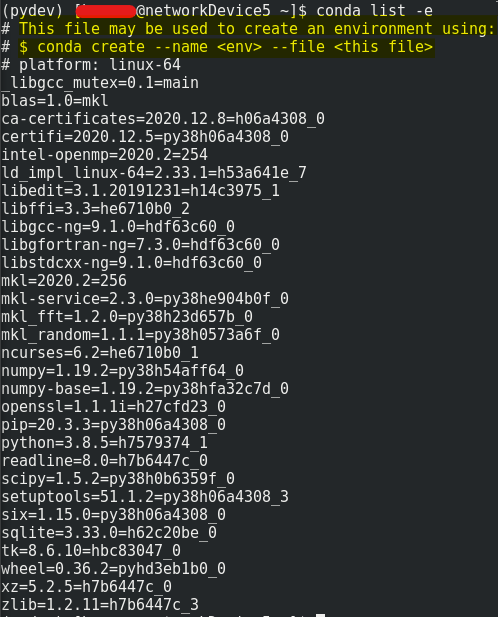
To create this spec list as a file in the current working directory, run:
1
conda list -e > spec-file.txt

tip: You can use
spec-file.txtas the filename or replace it with a filename of your choice.An explicit spec file is not usually cross platform, and therefore has a comment at the top such as
# platform: osx-64showing the platform where it was created. This platform is the one where this spec file is known to work. On other platforms, the packages specified might not be available or dependencies might be missing for some of the key packages already in the spec.To use the spec file to create an identical environment on the same machine or another machine:
1
conda create --name myenv --file spec-file.txt
To use the spec file to install its listed packages into an existing environment:
1
conda install --name myenv --file spec-file.txt
Conda does not check architecture or dependencies when installing from a spec file. To ensure that the packages work correctly, make sure that the file was created from a working environment, and use it on the same architecture, operating system, and platform, such as linux-64 or osx-64.

Clone an environment
Use the terminal or an Anaconda Prompt for the following steps:
You can make an exact copy of an environment by creating a clone of it:
1 | conda create --name myclone --clone myenv |
To verify that the copy was made:
1 | conda info --envs |
In the environments list that displays, you should see both the source environment and the new copy.
Share an environment
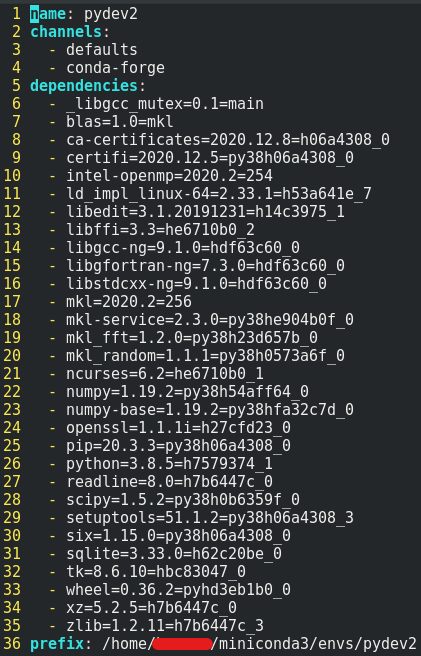
You may want to share your environment with someone else—for example, so they can re-create a test that you have done. To allow them to quickly reproduce your environment, with all of its packages and versions, give them a copy of your environment.yml file.
Exporting the environment.yml file
If you already have an
environment.ymlfile in your current directory, it will be overwritten during this task.
Activate the environment to export:
conda activate pydev2Export your active environment to a new file:
1
conda env export > environment.yml
This file handles both the environment’s pip packages and conda packages.
Email or copy the exported
environment.ymlfile to the other person.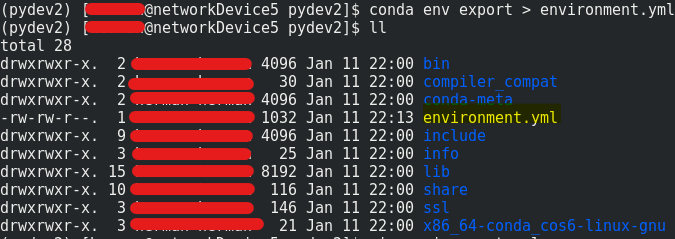
Restore an environment
Conda keeps a history of all the changes made to your environment, so you can easily “roll back” to a previous version. To list the history of each change to the current environment: conda list --revisions
To restore environment to a previous revision: conda install --revision=REVNUM or conda install --rev REVNUM.
Replace REVNUM with the revision number.
Example: If you want to restore your environment to revision 8, run conda install --rev 8.
Remove an environment
To remove an environment, in your terminal window or an Anaconda Prompt, run:
1 | conda remove --name pydev --all |
To verify that the environment was removed, in your terminal window or an Anaconda Prompt, run:
1 | conda info --envs |
The environments list that displays should not show the removed environment.