
Increase Disk Space for Linux Virtual Machine Created by VMware
Virtual machine is a major way to setup Linus development environment in Windows PC. One of the great things about newly Linux distro such as RHEL, Ubuntu, Centos etc is that most of them adopt to a LVM (Logical Volume Manager) filesystem which is a natural fit for Linux virtualized system like VMware or VitualBox.
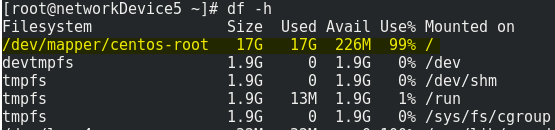
The main characteristic for LVM is that it is able to adjust filesystem volume dynamically by integrating multiple partitions which feel like one partition on one disk after LVM adjustment, moreover, adding and remove partitions to increase and shrink disk space also become very easy than before and this feature applies virtualized hard drive and makes it very easy to grow the disk space within few steps setup. You might ask what is the point to do that, I would say if you make virtual machine as your main development environment, the disk space is going to run out quickly as time goes by when more and more tools and libraries are installed. I have my VM hard disk initial 20GB by default setting but after I setup all my environment items my root directory only has 300MB space left.
I will grow disk space with my Linux virtual machine to 40GB:
Before we make our hands dirty, it’s necessary to get some basic understanding about the LVM in terms of 3 key things, they are PV (physical volumes), VG (volume groups) and LV (logical volumes). LVM integrates multiple partitions or disks into a big independent partition (VG), then formats it to create multiple logical volumes (LV) to be able to mount filesystem.
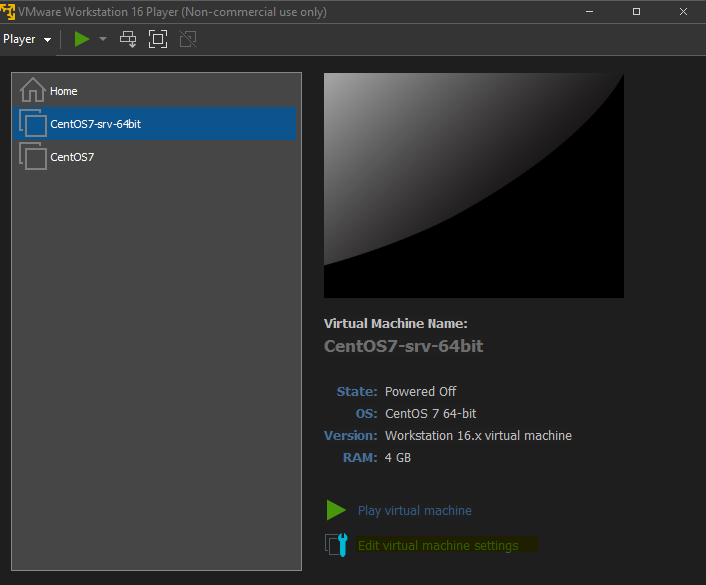
Assign more space or partition on virtual machine setting
The first step is that assign space you want on virtual machine console, bear in mind, the host must be shutdown before doing anything change. In this case, we will use WMware as example, the VIrtualBox is similar.
The fast and alternative way is use command line:
1 | vmware-vdiskmanager.exe -x 40GB "your virtual disk name.vmdk" |
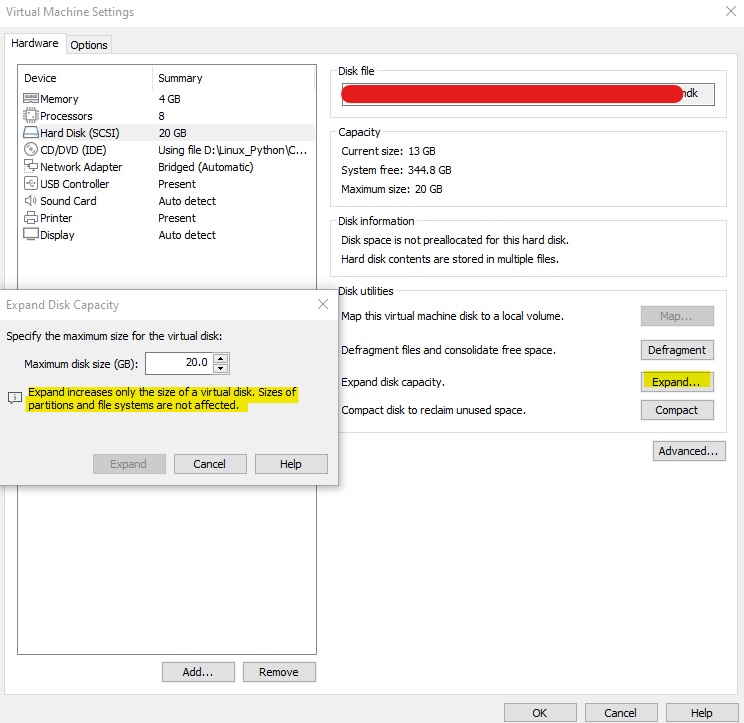
Things may be tricky here if you were new to virtual machine as above highlight “Expand increases only the size of a virtual disk. Sizes of partitions and file systems are not affected“, it looks like no that easy to expand the disk space only by VMWare setup, because now it only adds more unpartitioned space to the virtual hard disk.
Convert the unpartitioned space into usable filesystem so it can be included within the LVM filesystem.
LVM configuration to extend new partition to mount filesystem
Boot Linux VM and switch to root account.
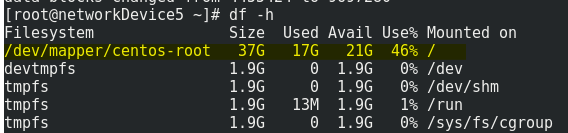
We first check out our disk partition status in advanced so that we can see clearly the change before and after, there are many commands in Linux e.g df -h, mount, here we use lsblk which is abbreviation of list block device
1 | lsblk -ip /dev/sda |
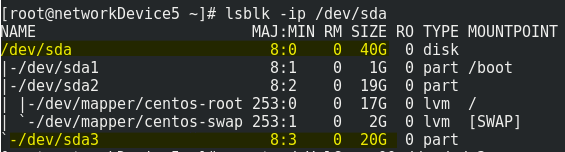
from return data, we know our total disk space is 40G, new unpartitioned disk /dev/sda3 with 20G is new added space, now let’s see how to create a new partition that takes up 20G space.
Create a new partition for unallocated space
There are 2 disk partition tools we can utilize to create a new partition in according to your partition table format, fdisk is for MBR and gdisk is for GPT. We can use gdisk to check our partition format
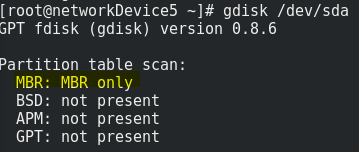
we can see MBR is the partition table for current system so that we will use fdisk to create partition.
1 | fdisk /dev/sda |
1 | n (new) |
Reboot the system so the new partition is recognized by the system; if you don’t want to reboot, there is a command to update partition table like source that is partprobe
1 | partprobe -s |

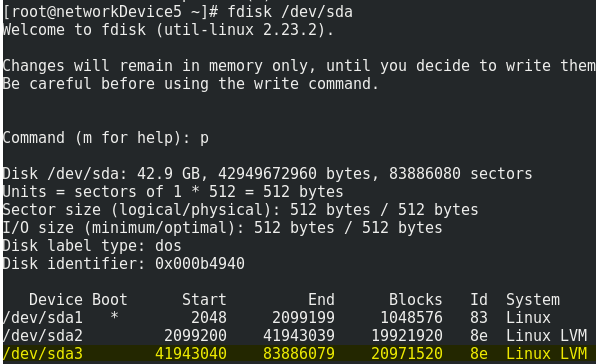
We first check our disk ID to make sure “8e“ is presented as Linux file system type ID and under Linux LVM system
LVM operation to mount new partition to file system
The next step is to use LVM to take the newly formed partition and turn it into a new Physical Volume, add it to a Volume Group, and finally assimilate its free space into a Logical Volume.
Convert /dev/sda3 partition into a Physical Volume so LVM can make use of it:
1 | pvcreate /dev/sda3 |
Add the new Physical Volume to the Volume Group as additional free space:
1 | vgextend centos /dev/sda3 |
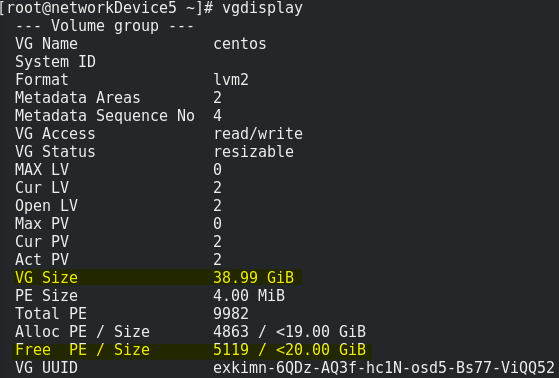
Note the free space now in the Volume Group which can now be assigned to a Logical Volume
1 | vgdisplay |
Have the Logical Volume (within the Volume Group) overtake the remaining free space of the Volume Group:
1 | lvextend -l +100%FREE /dev/centos/root |
1 | vgdisplay |
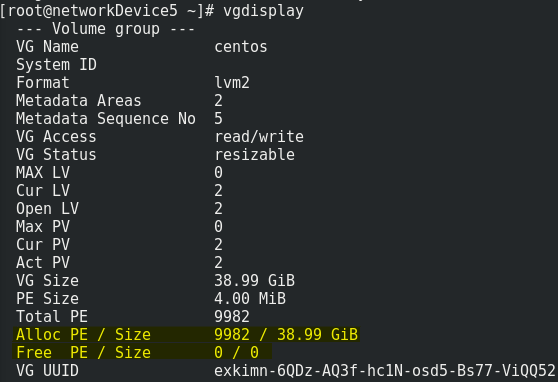
You can see all free space is now allocated.
The last step, we use xfs_growfs command to make logical volume live and mount filesystem so the new disk space can be used right away:
1 | xfs_growfs /dev/centos/root |
from above, you might feel the useful of LVM but extend is only one feature of it, we summarize all features of LVM by below table for reference:
| Task | PV | VG | LV | Filesystem (XFS/EXT4) |
|---|---|---|---|---|
| Scan | pvscan | vgscan | lvscan | lsblk, blkid |
| Create | pvcreate | vgcreate | lvcreate | mkfs.xfs/mkfs.ext4 |
| Display | pvdisplay | vgdisplay | lvdisplay | df, mount |
| Extend | N/A | vgextend | lvextend (lvresize) | xfs_growfs/resize2fs |
| Reduce | N/A | vgreduce | lvreduce (lvresize) | N/A/resize2fs |
| Remove | pvremove | vgremove | lvremove | umount |
| Resize | N/A | N/A | lvresize | xfs_growfs/resize2fs |
| Attribute | pvchange | vgchange | lvchange | /etc/fstab, remount |